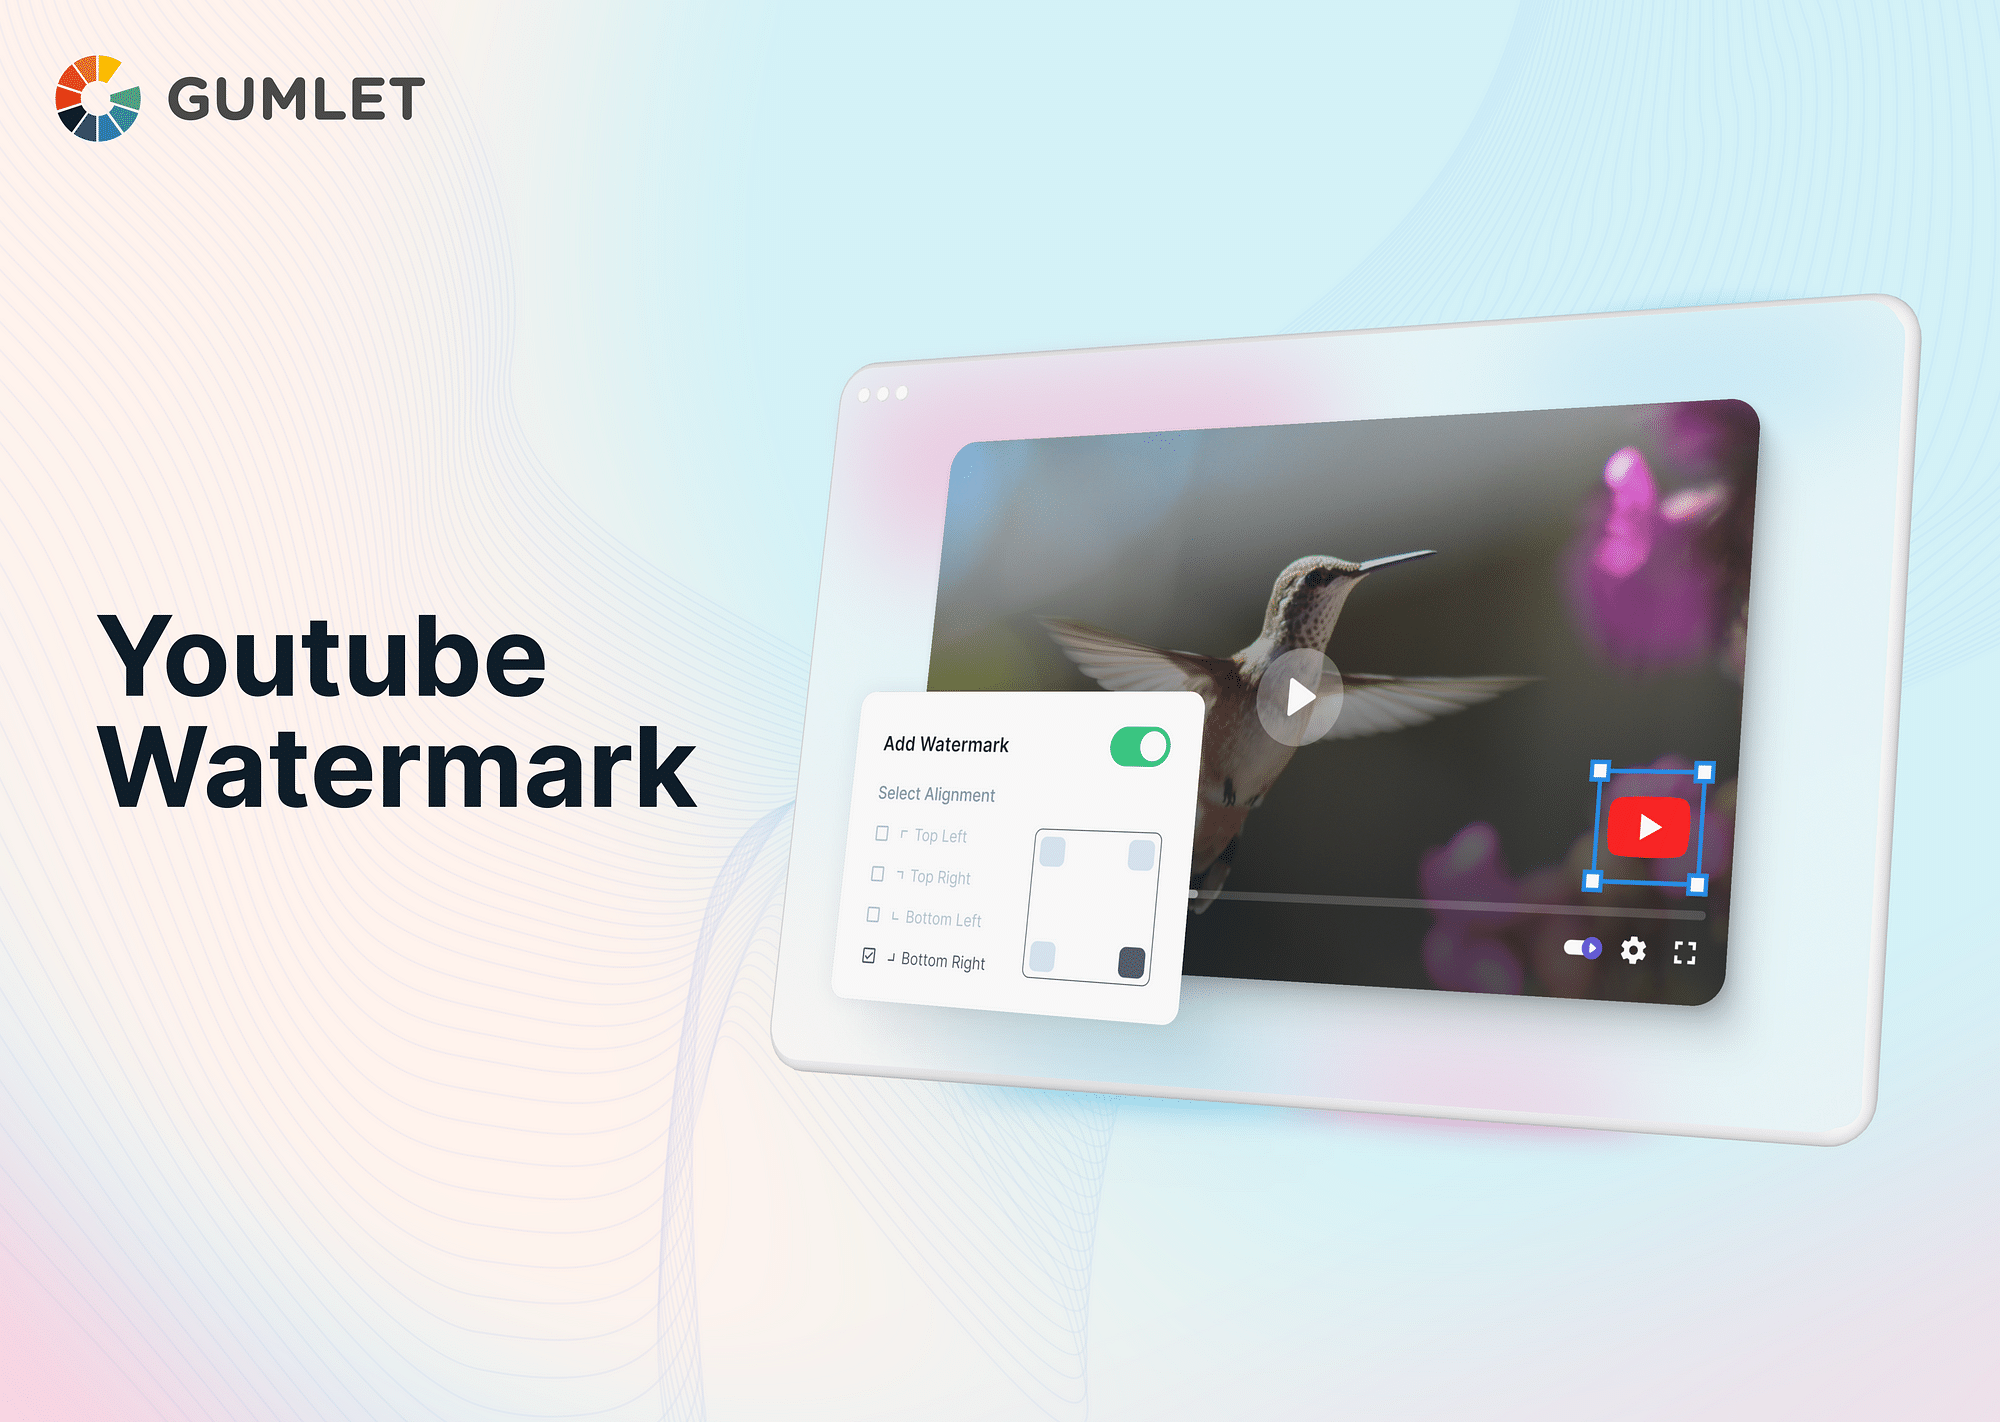
What is a YouTube Watermark?
A YouTube watermark is a semi-transparent image or logo that creators can add to their videos as a form of branding and protection. It appears on the bottom right corner of the video throughout its duration and helps reinforce the creator's brand identity while discouraging unauthorized use of their content.
Why Should I Have a Watermark on YouTube?
- A watermark can help reinforce your brand identity and make your channel more recognizable.
- A watermark can deter unauthorized use or distribution of your video content.
- Including a watermark can make your videos look more polished and professional, giving your channel a consistent and credible visual identity.
- YouTube allows you to use a watermark as a subscribe button. When viewers hover over the watermark, they can directly subscribe to your channel, potentially increasing your subscriber count.
Best Online Tools to Create YouTube Watermarks
When creating a YouTube watermark, various online tools are available that make the process simple and convenient. Let's explore four popular options:
Using Canva
Canva is a user-friendly graphic design platform that offers a wide range of templates and customization options. To create a YouTube watermark with Canva, follow these steps:
- Sign up for a Canva account or log in if you already have one.
- Choose "Custom dimensions" and enter the recommended size for YouTube watermarks, which is 150 x 150 pixels.
- Customize your watermark by adding text, shapes, or your logo. You can change the font, color, size, and other design elements to align with your brand.
- Once you're satisfied with the design, download the watermark image in PNG format for optimal quality.
Using Adobe Photoshop
Photoshop is a professional image editing software widely used by designers. Here's how to create a YouTube watermark using Photoshop:
- Open Photoshop and create a new file with the recommended watermark size of 150 x 150 pixels.
- Design your watermark by incorporating your logo, text, or other graphical elements. Use layers to add transparency and adjust the opacity for a subtle appearance.
- Fine-tune the design by selecting appropriate colors, fonts, and placements to enhance its visibility and brand recognition.
- Save the watermark as a PNG file to preserve its transparency.
Using Pixlr
Pixlr is a versatile online photo editing tool that offers both basic and advanced features. To create a YouTube watermark using Pixlr, follow these steps:
- Go to the Pixlr website and select the "Editor" option.
- Create a new image with the recommended dimensions of 150 x 150 pixels.
- Design your watermark by adding text, shapes, or overlays. Adjust the transparency settings to achieve the desired effect.
- Customize the watermark's appearance by applying filters, adjusting colors, or adding special effects.
- Save the watermark as a PNG file for optimal quality.
Using Kapwing
Kapwing is a versatile online video editing platform that also offers tools for creating graphics, including watermarks. Here's a step-by-step guide:
- Visit the Kapwing website. Click on "Start a new project" and select "Image."
- Select the recommended size for YouTube watermarks (150 x 150 pixels).
- Use Kapwing's tools to add text, shapes, images, or even animated elements to your watermark. Adjust the color, font, size, and position of your elements to create a unique and visually appealing watermark.
- Once you're satisfied with your design, download the watermark image in PNG format for optimal quality.
Bonus: Kapwing's Free YouTube Watermark Templates
Kapwing offers a variety of pre-designed YouTube watermark templates that you can customize to suit your brand. These templates can save you time and effort while creating a professional-looking watermark.
How to Upload a YouTube Watermark?
There are two methods to upload a YouTube watermark: using the YouTube branding option or embedding the watermark with video editing software.
Method 1: Add Watermark with YouTube Branding Option
Here are the steps you can take to follow the method 1:
- Log in to your YouTube account and click on your profile picture in the top right corner.
- Select "YouTube Studio" from the dropdown menu.
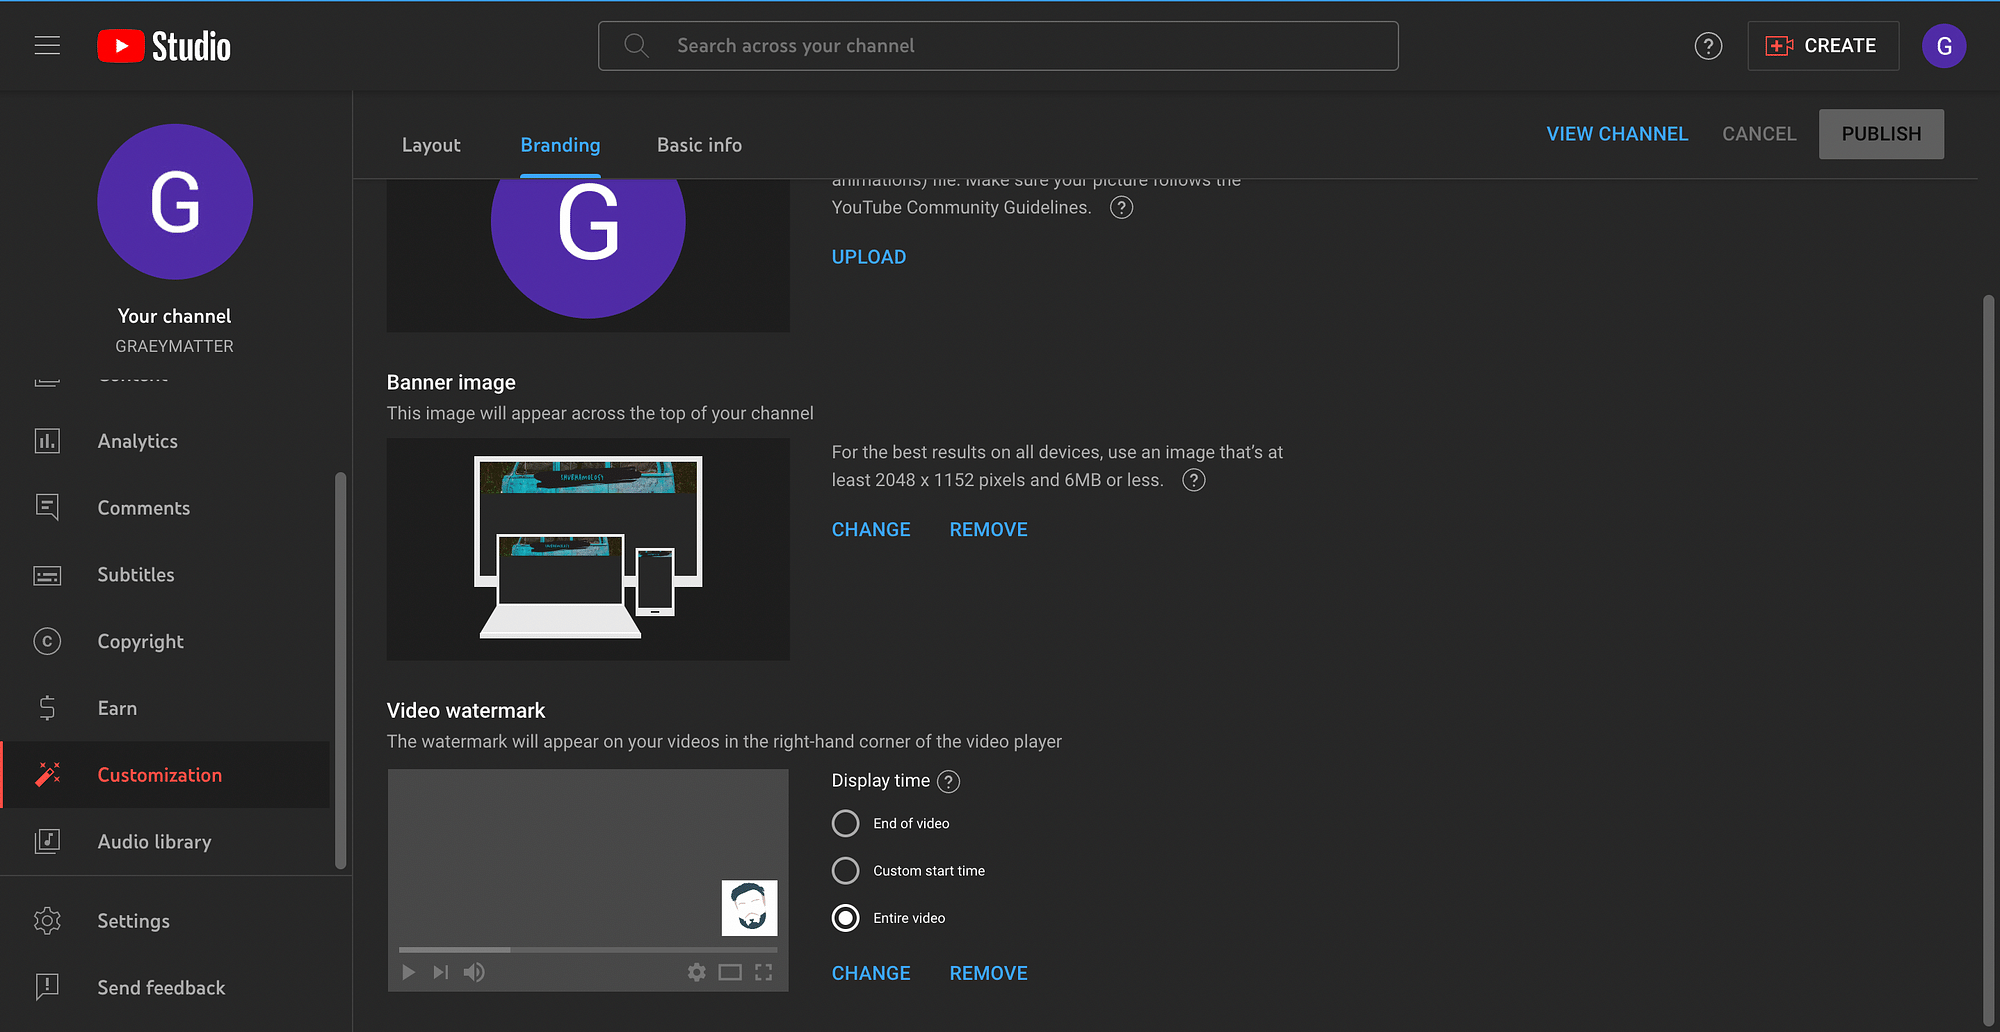
- In the YouTube Studio dashboard, click on the "Customization" option in the left sidebar.
- Navigate and click on "Branding" in the header section.
- Under the "Video watermark" section, click on the "Change" button.
- Upload your YouTube watermark image from your computer.
- Adjust the watermark display time and opacity settings according to your preferences.
- Use the preview player to see how the watermark will appear in your videos.
- Once satisfied, click the "Save" button to apply the watermark to your videos.
Method 2: Embed Watermark with Video Editing Software
Here are the steps you can take to follow the method 2:
- Import your video footage into video editing software such as Adobe Premiere Pro or Final Cut Pro.
- Create a new layer on top of your video timeline specifically for the watermark.
- Import your YouTube watermark image and place it on the new layer.
- Adjust the size and position of the watermark to your desired location on the video frame.
- Modify the opacity or transparency settings to ensure the watermark is visible but doesn't overpower the video content.
- Preview the video with the watermark to ensure it appears as intended.
- Once you're satisfied with the placement, export the video with the embedded watermark.
By embedding the watermark directly into the video, you add an additional layer of protection, as the watermark will remain visible even if someone tries to remove it from the video.
Best Practices for Using YouTube Watermark
- Use a square image with a size of 150 x 150 pixels for the watermark. This ensures it displays clearly across different devices without pixelation.
- Upload your watermark in a PNG format with a transparent background. This makes the watermark blend seamlessly with your video content.
- Consider setting the watermark’s opacity to around 50-70%. This keeps it visible without being too overpowering or distracting from the content.
- Keep the watermark design simple and minimalistic. Avoid complex details or text that might become unreadable in smaller sizes.
- You can set your watermark to appear for the entire duration of the video or during specific segments. It’s recommended to display it throughout the video to maximize visibility.
- YouTube watermark should reflect your brand's identity and style. Consider using consistent colors, fonts, and imagery that align with your overall branding and rebranding efforts.
Conclusion
Creating a YouTube watermark is a valuable branding and protection tool for content creators. By utilizing online tools, you can easily design a watermark that aligns with your brand's identity. Remember to consider image specifications, branding customization, and design changes to make your watermark visually appealing and engaging. Uploading the watermark on YouTube can be done through the YouTube branding option or by embedding it with video editing software. Choose the method that best suits your needs and enhance your brand presence while safeguarding your content.
FAQs
1. How to remove the YouTube watermark?
To remove the YouTube watermark, follow these steps:
- Log in to your YouTube account and access YouTube Studio.
- Go to the "Settings" menu and select the "Channel" tab.
- Click on "Branding" and find the watermark section.
- Click on the "Remove" button to delete the watermark from your videos.
2. Why doesn't my watermark show on YouTube?
If your watermark doesn't show on YouTube, ensure that you have followed the correct process of uploading the watermark. Check the dimensions, file format (PNG is recommended), and transparency settings. Due to YouTube's processing time, the watermark may take some time to appear on all your existing videos.
- Does a watermark affect monetization?
No, adding a watermark to your YouTube videos does not impact monetization. It simply serves as a branding tool and does not interfere with ads or revenue generation.
- How to edit YouTube watermark?
To edit your YouTube watermark, go to YouTube Studio > Customization > Branding, where you can upload, change, or remove the watermark from your videos.