Slow-motion videos have taken over social media feeds everywhere, from mesmerizing reels of a dog leaping into a pool to detailed tutorials showing how to craft something step by step. Whether you want to create a dramatic storytelling effect or emphasize a tiny detail that’s easy to miss in real time, learning how to slow down a video on iPhone is essential.
The best part? You don’t need to own the latest iPhone 15 Pro to create smooth slow-motion clips—these techniques work across most iPhone models running recent versions of iOS.
How to Slow Down a Video on iPhone
There are several simple and effective ways to slow down a video on iPhone, whether you want to film new footage in slow motion or transform existing clips into smooth, cinematic sequences. From using the built-in Slo-Mo mode to editing later with iMovie or third-party apps, here’s a step-by-step guide to help you pick the method that suits your project best. Learning how to slow-mo a video on iPhone gives you endless creative possibilities for tutorials, social media reels, or just capturing life’s little details.
Method 1: Use the iPhone Camera’s Slo-Mo Mode
If you’re wondering how to make a video slow motion on an iPhone without installing extra apps, recording directly in Slo-Mo mode is the easiest approach. This feature captures your video at a high frame rate—usually 120 or 240 frames per second—so when you play it back, it’s automatically slowed down while maintaining sharp quality.
- Open the Camera app on your iPhone.
- Swipe across the modes at the bottom until you see Slo-Mo.
- Tap the red record button to start filming.
- When you’re done, tap the button again to stop recording.
The footage will already be in slow motion, perfect for highlighting fast actions like sports, dancing, or water splashes.
How to adjust the slow-motion range in the Photos app:
After recording, you can customize how to slow a video down on iPhone by adjusting where the slow-motion effect begins and ends:
- Open the Photos app and find your slo-mo video.
- Tap Edit in the top right corner.
- You’ll see a timeline with thicker lines in the middle—this section is where the video plays in slow motion.
- Drag the sliders left or right to change exactly when the slow motion starts and stops.
- Tap Done to save.
Tip: If you’re wondering how to make a video slow motion on an iPhone without installing extra apps, recording directly in Slo-Mo mode is the easiest approach. The Slo-Mo mode works best in bright lighting and for scenes with quick motion. Using this method ensures you capture high frame-rate footage, resulting in the smoothest slow-motion playback.
Method 2: Use the Photos App to Edit a Slo-Mo Video
Already recorded a video in Slo-Mo but want to fine-tune it? Here’s how to slow down a video on iPhone camera roll using only the Photos app:
The
- Open the Photos app and locate your slo-mo clip.
- Tap on the video thumbnail to open it.
- Tap Edit at the top right.
- At the bottom, you’ll see a timeline with adjustable handles.
- Drag the handles to set the portion of the video you want to play in slow motion.
- Tap Play to preview the changes.
- Once you’re satisfied, tap Done to save your edits.
This method is fast, doesn’t require any downloads, and is ideal if you’re tweaking a slo-mo video after recording. However, keep in mind you can only adjust clips originally recorded in Slo-Mo—how to make a normal video slow motion iPhone 13 requires a different approach, like iMovie.
Method 3: Convert a Normal-Speed Video into Slow Motion (Using iMovie)
If you forgot to record in Slo-Mo, don’t worry. You can still convert a video to slow motion on iPhone using iMovie, Apple’s free video editor. This is one of the best ways to slow down standard-speed clips.
How to make a normal video slow motion on iPhone 13 or other models:
- Download and open iMovie:
- Find iMovie in the App Store and install it (it’s free).
- Launch the app and tap Create Project, then choose Movie.
- Import your video:
- Select the video you want to slow down from your camera roll.
- Tap Create Movie at the bottom of the screen.
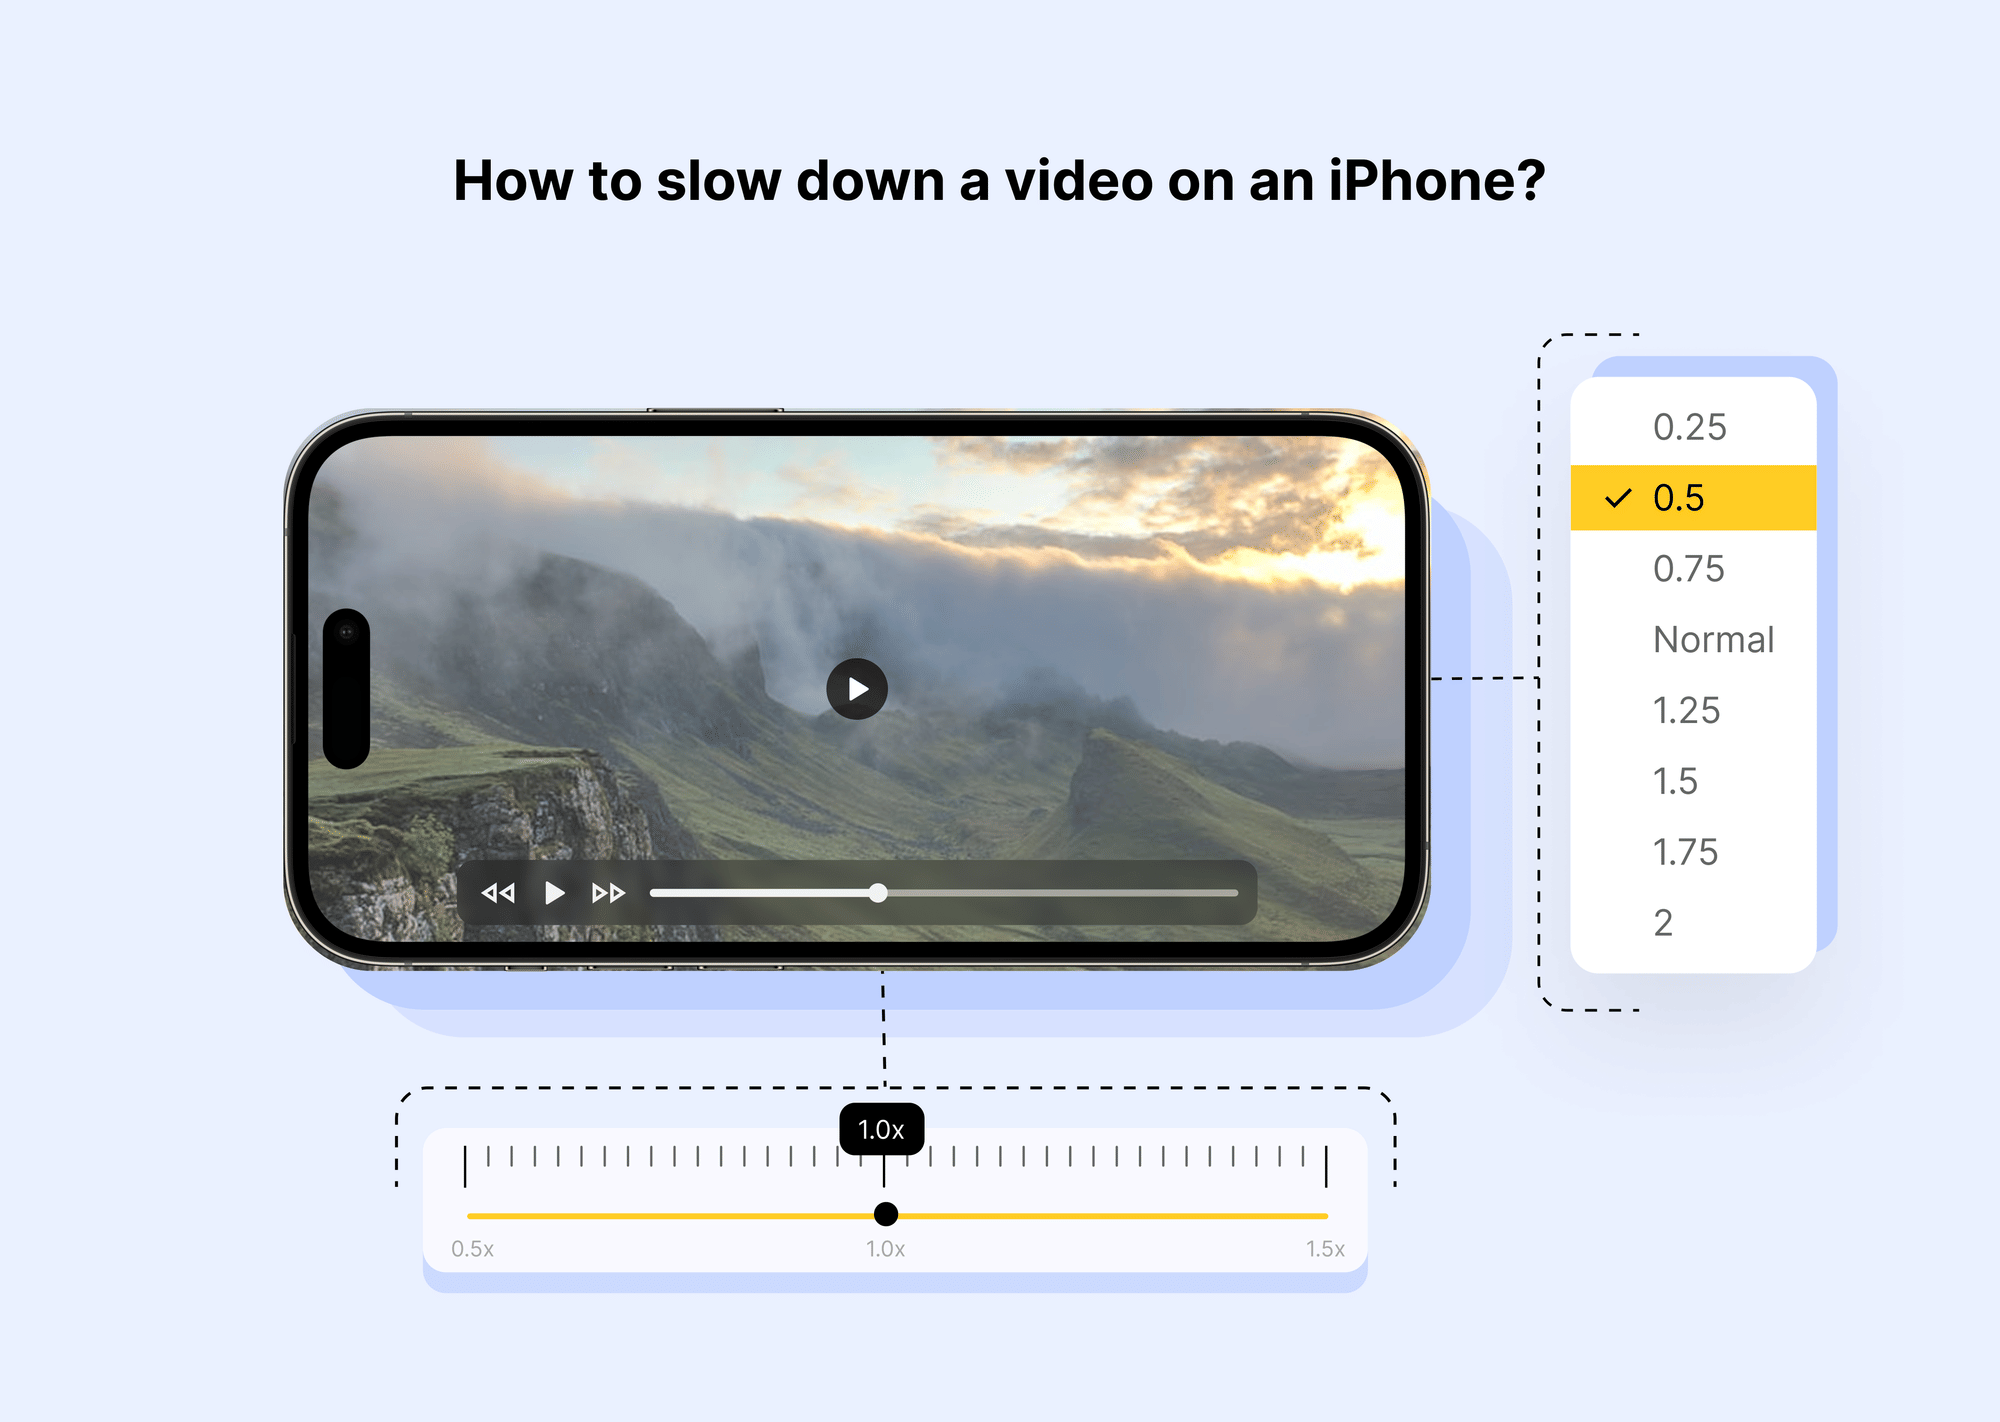
- Adjust the speed:
- Tap the clip in the timeline so it becomes highlighted.
- At the bottom of the screen, tap the Speedometer icon (it looks like a speed dial).
- Drag the slider toward the turtle icon to reduce speed. You’ll see the percentage below indicating how much slower it will play.
- Preview and save:
- Tap Play to preview your slow-motion video.
- When you’re happy with the result, tap Done in the top left.
- Tap the Share icon and choose Save Video to export it back to your Photos app.
This method is one of the easiest ways to make a normal video slow motion iPhone style while maintaining good quality.
Method 4: Use Third-Party Video Editing Apps
For even more control over your edits and extra creative features, you can use third-party apps. These apps often let you combine slow motion with transitions, text, and filters to make your videos stand out.
Recommended apps:
- CapCut: Free, no watermark if you choose the correct settings.
- InShot: Simple to use, but the free version adds a watermark.
- VN Video Editor: Offers professional-grade speed controls and effects.
Example: How to slow a video down on iPhone using CapCut:
- Download CapCut from the App Store and open it.
- Tap New Project, then select the video you want to edit.
- Tap Add to import the video into your timeline.
- Tap the clip on the timeline to highlight it.
- Select Speed at the bottom of the screen.
- Choose Normal.
- Drag the slider to the left to slow down the video to your desired speed.
- Tap the check mark to apply.
- Preview your video to ensure it looks the way you want.
- Tap Export in the top right corner to save or share.
Pros and Cons of Third-Party Apps:
- Pros:
- More precise speed controls.
- Extra features like filters, transitions, and text overlays.
- Some apps support exporting in higher resolutions.
- Cons:
- Many free versions add watermarks.
- Some features may require in-app purchases.
Third-party apps are perfect if you want to explore beyond Apple’s default tools and experiment with unique styles or advanced editing.
How to Slow Down a Video Without Using an App
If you’d prefer not to clutter your iPhone with new downloads, you still have a few options to slow down a video on iPhone using only built-in tools. While these methods are slightly limited compared to third-party editors, they’re convenient, free, and integrated into iOS. Here’s how to make the most of them.
Use iMovie (Free and Official)
Even though it technically comes as a separate download, iMovie is Apple’s own free app and often already pre-installed on newer iPhones. If you want to convert a video to slow motion on iPhone without relying on paid software, iMovie remains your most reliable option.
- Why Use iMovie? Apple fully supports iMovie, has no subscription fees, and doesn’t force you to deal with watermarks or hidden charges.
- How to Slow-Mo a Video on iPhone with iMovie:
- Open iMovie and create a new Movie project.
- Import your video from the camera roll.
- Tap the clip timeline so it’s highlighted.
- Tap the speedometer icon and drag the slider toward the turtle icon to reduce speed.
- Preview and export your slow-motion video.
This approach is convenient if you’re looking for a clean, professional result without using any additional editing apps. iMovie’s speed adjustments are smooth and precise, making it one of the simplest ways to slow down a video on iPhone camera roll after recording at normal speed.
Advanced Tip – iCloud and Live Photos
If you’re feeling experimental, you can also use iCloud and Live Photos to create a slow-motion look for short clips. While this isn’t a true frame-rate slowdown like Slo-Mo mode, it can mimic the effect for photos and short bursts:
- How it Works: When you take a Live Photo (by tapping the circular icon in the Camera app), your iPhone captures a few seconds of motion and sound.
- Creating a Slow-Mo Effect:
- Open the Live Photo in the Photos app.
- Swipe up to reveal Effects.
- Choose Long Exposure or Loop.
- Export as a video or GIF to simulate a slowed-down look.
This technique can be helpful if you’re sharing clips to social media and want a creative twist. However, it doesn’t provide the same control you get when you make a normal video slow motion iPhone with iMovie or a dedicated app.
Important Limitations to Keep in Mind
While it’s great to have free options, the Photos app has a major restriction:
You cannot slow down a standard-speed video in Photos if it was not recorded in Slo-Mo mode.
This means if you filmed something in regular video mode, you’ll need to either use iMovie or a third-party app like CapCut or InShot to slow it down properly. For many users searching for how to slow down a video on iPhone, this is the main roadblock—Photos simply won’t let you apply a slow-motion effect to normal clips without editing software.
How to Undo Slow Motion on a Video
Sometimes you might change your mind after editing or accidentally slow down footage you’d rather keep at normal speed. Whether you used the Camera app’s Slo-Mo mode or applied a slow-motion effect in editing, it’s easy to un-slow-mo a video on iPhone and return it to its original playback speed. Here’s how to do it step by step.
Revert Edits from the Photos App
If you used the built-in Slo-Mo mode in the Camera app, you can remove the slow-motion portion directly in Photos:
- Open your slo-mo video in the Photos app.
- Tap Edit in the top right corner.
- At the bottom of the screen, you’ll see a timeline with thicker lines in the middle indicating the slow-motion range.
- Drag both sliders all the way across so the thicker section covers no part of the timeline—this effectively sets the entire clip to normal speed.
- Tap Done to save your changes.
This method is the quickest way to undo slow motion on a video on an iPhone and is especially useful if you only made a small adjustment in Photos.
Adjust the Speed Back in iMovie
If you slowed down your video using iMovie (for example, to make a normal video slow motion iPhone 13), you can just as easily restore the original speed:
- Open iMovie and locate the project containing your video.
- Tap the video clip in the timeline so it’s highlighted.
- Tap the Speedometer icon (speed control) at the bottom of the screen.
- Drag the slider back toward the rabbit icon, which represents 1x normal speed.
- Tap Play to preview and confirm that the video is no longer slowed down.
- When you’re satisfied, tap Done and export your video again to save the changes.
This is the most reliable option if you’ve been using iMovie to slow down a video on the iPhone camera roll after recording.
Final Thoughts
Learning how to slow down a video on iPhone is easier than ever, thanks to built-in features and free apps like iMovie. Whether you’re using the Slo-Mo camera mode, editing in Photos, or relying on CapCut for professional effects, you have plenty of ways to create the perfect slow-motion sequence.
Even older iPhones that still support recent iOS versions can handle most of these methods seamlessly. Don’t hesitate to experiment with different tools—you might be surprised by how creative your slow-motion videos can become.
FAQs
How can I slow down a recorded video on an iPhone?
Use iMovie or a third-party app like CapCut. Import your video, select the speed tool, and drag the slider to slow it down.
Can I convert a video to slow motion on iPhone?
Yes. You can convert a video to slow motion on iPhone using iMovie or apps like InShot, even if you didn’t record it in Slo-Mo.
How do I reduce the speed of a video?
Open iMovie, import the clip, tap the speedometer icon, and adjust the slider to reduce the playback speed.
How to make a video slow motion on iPhone after recording?
Use iMovie or third-party apps. These tools let you make video slow motion iPhone style with just a few taps.
How to slow down a video on the helpfuliPhone camera roll?
If it was recorded in Slo-Mo mode, open Photos > tap Edit > adjust the sliders. If not, use iMovie or another editor.
How to undo slow motion on a video on an iPhone?
Open the video in Photos, tap Edit, and slide the slow-motion range handles back to cover none of the clip. In iMovie, reset the speed slider to normal.